JavaEE 7教程
JSF的Hello world案例
在Eclipse中创建一个动态Web项目dynamic project,你的Eclipse需要是for JEE版本,如下图:必须配置Target runtime,选择tomcat 7,然后指定你的tomcat的位置即可。
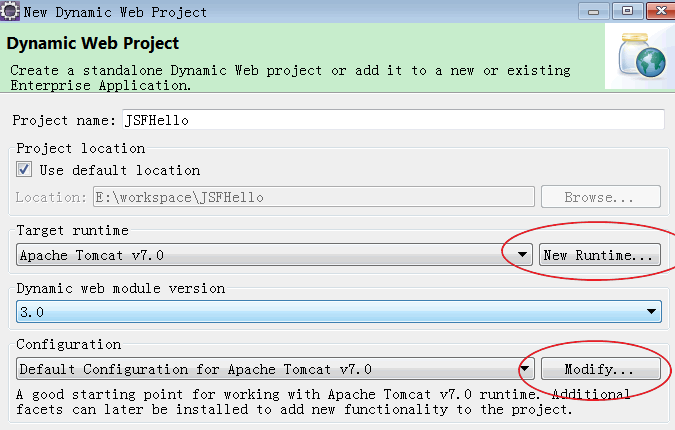
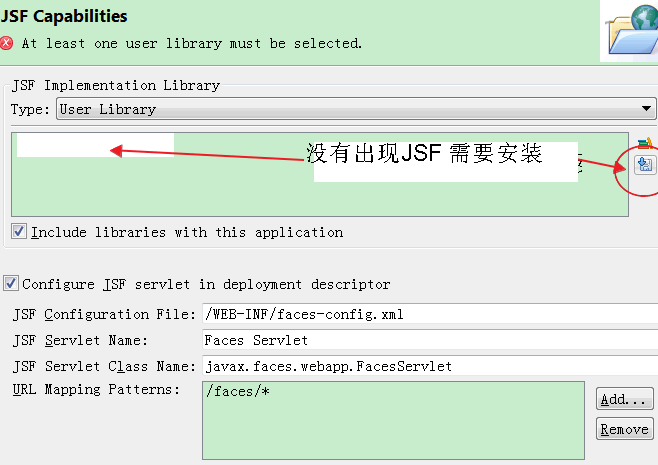
选择修改modify配置如下,选择JavaServer Face 2.0 (JSF 2.0)或更高2.1 2.*,然后选择next下一步,直到出现如下界面:
创建一个Hellobean:
@ManagedBean
@SessionScoped
public class HelloBean implements Serializable {

private static final long serialVersionUID = 1L;

private String name;

public String getName() {
return name;
}

public void setName(String name) {
this.name = name;
}
}
在WebContent目录下创建hello.xhtml模板:
<?xml version="1.0" encoding="UTF-8"?>
<!DOCTYPE html PUBLIC "-//W3C//DTD XHTML 1.0 Transitional//EN"
"http://www.w3.org/TR/xhtml1/DTD/xhtml1-transitional.dtd">
<html xmlns="http://www.w3.org/1999/xhtml"
xmlns:f="http://java.sun.com/jsf/core"
xmlns:h="http://java.sun.com/jsf/html">

<h:head>
<title>JSF 2.0 Hello World</title>
</h:head>
<h:body>
<h3>JSF 2.0 Hello World Example</h3>
<h:form>
<h:inputText value="#{helloBean.name}"></h:inputText>
<h:commandButton value="Click" action="welcome"></h:commandButton>
</h:form>
</h:body>
</html>
welcome.xhtml模板:
<?xml version="1.0" encoding="UTF-8"?>
<!DOCTYPE html PUBLIC "-//W3C//DTD XHTML 1.0 Transitional//EN"
"http://www.w3.org/TR/xhtml1/DTD/xhtml1-transitional.dtd">
<html xmlns="http://www.w3.org/1999/xhtml"
xmlns:f="http://java.sun.com/jsf/core"
xmlns:h="http://java.sun.com/jsf/html">

<h:head>
<title>JSF 2.0 Hello World</title>
</h:head>
<h:body bgcolor="white">
<h2>JSF 2.0 Hello World Example</h2>
<h3><i>Welcome #{helloBean.name}</i></h3>
</h:body>
</html>
修改 WEB-INF 下web.xml,加入:
<display-name>JSF2.0HelloWorld</display-name>
<context-param>
<param-name>javax.faces.PROJECT_STAGE</param-name>
<param-value>Development</param-value>
</context-param>
<welcome-file-list>
<welcome-file>faces/hello.xhtml</welcome-file>
</welcome-file-list>
<servlet>
<servlet-name>Faces Servlet</servlet-name>
<servlet-class>javax.faces.webapp.FacesServlet</servlet-class>
<load-on-startup>1</load-on-startup>
</servlet>
<servlet-mapping>
<servlet-name>Faces Servlet</servlet-name>
<url-pattern>/faces/*</url-pattern>
</servlet-mapping>
<servlet-mapping>
<servlet-name>Faces Servlet</servlet-name>
<url-pattern>*.jsf</url-pattern>
</servlet-mapping>
<servlet-mapping>
<servlet-name>Faces Servlet</servlet-name>
<url-pattern>*.faces</url-pattern>
</servlet-mapping>
<servlet-mapping>
<servlet-name>Faces Servlet</servlet-name>
<url-pattern>*.xhtml</url-pattern>
</servlet-mapping>
</web-app>
在eclipse中运行该项目,Eclipse项目右键,run on Server。
如果想独立于Eclipse对项目打包成war,可见:使用gradle开发第一个Java项目