使用Apache Mesos和Consul实现服务的注册发现
为保证基于Docker应用程序和服务都具有高性能和可用性,设计出一种具有服务发现,高可用性和容错能力的解决方案非常重要。
我们使用Apache Mesos 和Mesosphere的 Marathon实现Docker的任务调度和应用部署,Mesos能够帮助完成高可用性 高容错性。
作为服务编排注册和发现, Consul 不仅能够作为一个key/value存储,而且能够支持错误侦测以及多数据中心支持。注册定义是当有Docker容器启动或停止时,其他Docker容器应该能获知,使用Apache Consul实现注册或注销Docker容器的微服务名称以及发布端口。Consul-template 是一个独立的应用,能够查询Consul并且更新文件系统上的一个文件模板,正如你看到一样,使用Consul/Consul-template实现注册的捆绑能够帮助完成动态服务的注册和发现,以及配置文件的更新,我们可以使用这些工具与Haproxy联合一起为所有服务请求提供一个通用的代理网关。
安装步骤
假设 Consul为3个或5个服务器集群工作,每个服务器节点包括所有mesos 主从服务器和haproxy等都必须有一个Consul代理网关安装和运行。
安装Consul 服务器和代理节点的步骤:
wget https://dl.bintray.com/mitchellh/consul/0.4.1_linux_amd64.zip
unzip 0.4.1_linux_amd64.zip
cp consul /usr/local/bin
Consul服务器设置
我们配置3个vm作为Consul服务器集群. 按照Consul网站的 the server setup instructions 设置服务器集群创建领导人选举,如果一切正常,你应该能通过运行'consul members'看到所有服务器节点。
Consul节点设置
按照Consul网站的 the agent setup instructions安装,键入'consul members' 应该可以看到所有服务节点,包括服务器节点。
设置Mesos主服务器
我们可以按照 Mesosphere Master Node Instructions指引安装和配置主节点,我们运行桑格主节点,设置2 quorum, 需要python egg来启动或停止脚步,除安装标准操作外,确保你还运行了下面指令:
curl -sSfL http://downloads.mesosphere.io/master/redhat/6/mesos-0.20.1-py2.6-linux-x86_64.egg –output /tmp/mesos.egg
easy_install –allow-hosts pypi.python.org /tmp/mesos.egg
一旦全部安装完成,键入命令启动:
start mesos-master
会出现:
[root@mesos-master-01 mesos-master]# ps -ef | grep master
root 8978 1 0 Oct29 ? 00:09:47 /usr/local/sbin/mesos-master --zk=zk://1.1.1.1:2181,
2.2.2.2:2181,3.3.3.3:2181/mesos --port=5050 --log_dir=/var/log/mesos
--hostname=1.1.1.1 --quorum=2 --work_dir=/var/lib/mesos
root 8990 8978 0 Oct29 ? 00:00:00 logger -p user.info -t mesos-master[8978]
root 8991 8978 0 Oct29 ? 00:00:00 logger -p user.err -t mesos-master[8978]
设置Mesos 从服务器
按照 Mesosphere Slave Node Instructions 安装从服务器,也需要安装python egg来运行启动脚本,运行以下命令:
curl -sSfL http://downloads.mesosphere.io/master/redhat/6/mesos-0.20.1-py2.6-linux-x86_64.egg –output /tmp/mesos.egg
easy_install –allow-hosts pypi.python.org /tmp/mesos.egg
一切安装正常后,运行:
start mesos-slave
你会看到:
ps -ef | grep slave
root 10749 3451 0 11:03 pts/0 00:00:00 grep slave
root 15229 1 0 Nov06 ? 00:25:01 /usr/local/sbin/mesos-slave
--master=zk://1.1.1.1:2181,2.2.2.2:2181,3.3.3.3:2181/mesos --log_dir=/var/log/mesos
--containerizers=docker,mesos
--executor_registration_timeout=5mins --hostname=172.25.1.35
root 15241 15229 0 Nov06 ? 00:00:00 logger -p user.info -t mesos-slave[15229]
root 15242 15229 0 Nov06 ? 00:00:00 logger -p user.err -t mesos-slave[15229]
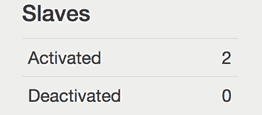
一旦安装所有mesos所有组件,你就可以通过端口 5050看见从服务器激活了。

安装Docker
wget http://dl.fedoraproject.org/pub/epel/6/x86_64/epel-release-6-8.noarch.rpm
rpm -Uvh epel-release-6*.rpm
yum install -y docker-io
配置后台运行配置,确保/etc/sysconfig/docker有如下:
other_args="-H tcp://0.0.0.0:4243 -H unix:///var/run/docker.sock"
启动Docker后台运行:service docker start
设置注册器
拉一个Docker image:
docker pull progrium/registrator
运行注册器容器 (确保Consul代理已经安装和运行)
docker run -d -v /var/run/docker.sock:/tmp/docker.sock -h $HOSTNAME progrium/registrator consul://localhost:8500
在注册器容器运行docker logs应该会看到:
2014/10/31 20:06:26 registrator: Using consul registry backend at consul://172.0.0.1:8500 2014/10/31 20:06:26 registrator: Listening for Docker events…
设置consul-template 和 haproxy
现在我们需要设置使用consul-template配置haproxy实例, 这样能在haproxy实现服务的动态注册和注销。
安装haproxy到你的vm, 然后安装consul-template. 确保Consul已经安装并且加入了集群. consul-template下载地址: https://github.com/hashicorp/consul-template/releases.
wget https://github.com/hashicorp/consul-template/releases/download/v0.2.0/
consul-template_0.2.0_linux_amd64.tar.gz
tar xvfz consul-template_0.2.0_linux_amd64.tar.gz cp consul-template /usr/local/bin
下面配置consul-template
首先创建一个模板配置文件,这个文件当启动consul-template时会被使用,创建文件在/data/cfg/consul/tmpl.json:
consul = "127.0.0.1:8500"
template {
source = "/etc/haproxy/haproxy.ctmpl"
destination = "/etc/haproxy/haproxy.cfg"
command = "service haproxy restart"
}
这个配置文件提供了所有consul-template需要的必备配置,使用它们consul-template能够实现haproxy配置,其中haproxy.cfg配置如下:
defaults REDIS
mode tcp
timeout connect 4s
timeout server 30s
timeout client 30s
listen http-in
bind *:80{{range service "web"}}
server {{.Node}} {{.Address}}:{{.Port}}{{end}}
listen http-in
bind *:4567{{range service "demoapp"}}
server {{.Node}} {{.Address}}:{{.Port}}{{end}}
frontend ft_redis
bind *:6379 name redis
default_backend bk_redis
backend bk_redis{{range service "redis"}}
server {{.Node}} {{.Address}}:{{.Port}}{{end}}
配置中有三个监听:一个是webapps监听在端口80, 一个是为sinatra webapps监听在端口 4567 ,一个redis监听端口是6379.
使用下面命令启动consul-template:
nohup consul-template -config /data/cfg/consul/tmpl.json > consul-template.out 2>&1 &
当名为 "web", "demoapp" "redis"的docker服务器启动后,节点的IP和端口信息将自动更新haproxy.cfg. Haproxy将会自动分发负载到后台docker服务,以随机分配的端口的方法,如果一个后台docker容器死机,它的节点IP和端口将被自动从haproxy.cfg移除。
视频和英文原文:Service Discovery & Orchestration With Mesos and Consul