大数据主题
Hadoop - 编程和安装
上页
前面我们已经了解了Hadoop的工作机制和原理,这章以wordcount也就是单词计数这个案例来看看如何开发具体java程序。具体代码如下:
public class SimpleWordCountMapperextends MapReduceBase implements
Mapper<LongWritable, Text, Text, IntWritable> {
//输出的(k,v)对象
static final Text word = new Text();
static final IntWritable one = new IntWritable(1);
@Override
public void map(LongWritable key, Text documentContents,
OutputCollector<Text, IntWritable> collector, Reporter reporter)
throws IOException {
String[] tokens = documentContents.toString().split("\\s+");//以空格分隔单词
for (String wordString : tokens) {
if (wordString.length() > 0) {
word.set(wordString.toLowerCase());
collector.collect(word, one);
}
}
}
}
注意到Mapper<LongWritable, Text, Text, IntWritable>这个类有四个类型参数,输入和输出,具体可见map方法参数,LongWritable key, Text documentContents是输入,OutputCollector<Text, IntWritable> collector, Reporter reporter是Map处理的输出。
下面再看看reduce代码:
public class SimpleWordCountReducer
extends MapReduceBase implements
Reducer<Text, IntWritable, Text, IntWritable> {
@Override
public void reduce(Text key, Iterator<IntWritable> counts,
OutputCollector<Text, IntWritable> output, Reporter reporter)
throws IOException {
int count = 0;
while (counts.hasNext()) {
count += counts.next().get();//统计单个词的次数。
}
output.collect(key, new IntWritable(count));//发射(word,count)
}
}
Reduce代码中Reducer是输入和输出类型,输入是Text key, Iterator<IntWritable> counts,输出OutputCollector<Text, IntWritable> output, Reporter reporter。
单元测试Hadoop的Job任务
MRUnit framework是一个测试Hadoop Job的测试框架,Mapper测试代码案例:
public class MapperTest {
MapDriver<Text, Text, Text, Text> mapDriver;
@Before
public void setUp() {
WordMapper mapper = new WordMapper();
mapDriver = MapDriver.newMapDriver(mapper);
}
@Test
public void testMapper() throws IOException {
mapDriver.withInput(new Text("a"), new Text("ein"));
mapDriver.withInput(new Text("a"), new Text("zwei"));
mapDriver.withInput(new Text("c"), new Text("drei"));
mapDriver.withOutput(new Text("a"), new Text("ein"));
mapDriver.withOutput(new Text("a"), new Text("zwei"));
mapDriver.withOutput(new Text("c"), new Text("drei"));
mapDriver.runTest();
}
}
Reducer测试代码案例:
public class ReducerTest {
ReduceDriver<Text, Text, Text, Text> reduceDriver;
@Before
public void setUp() {
AllTranslationsReducer reducer = new AllTranslationsReducer();
reduceDriver = ReduceDriver.newReduceDriver(reducer);
}
@Test
public void testReducer() throws IOException {
List<Text> values = new ArrayList<Text>();
values.add(new Text("ein"));
values.add(new Text("zwei"));
reduceDriver.withInput(new Text("a"), values);
reduceDriver.withOutput(new Text("a"), new Text("|ein|zwei"));
reduceDriver.runTest();
}
}
Maven依赖配置:
<dependency>
<groupId>org.apache.mrunit</groupId>
<artifactId>mrunit</artifactId>
<version>1.0.0</version>
<classifier>hadoop1</classifier>
<scope>test</scope>
</dependency>
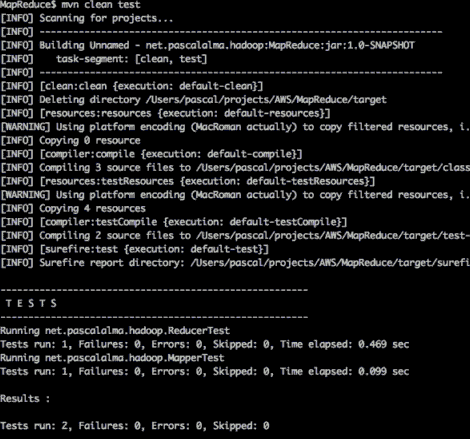
运行mvn clean test如下图:
使用Maven打包Hadoop应用
我们的mapreduce java类编写好后,要打包成jar包,编译打包需要Hadoop依赖包,可以使用Maven能解决依赖。安装好Maven以后,运行下面命令创建一个空白的pom.xml:"
mvn archetype:generate -DgroupId=com.jordiburgos -DartifactId=wordcount
 -DarchetypeArtifactId=maven-archetype-quickstart -DinteractiveMode=false
加入Hadoop的依赖:
<repositories>
<repository>
<id>cloudera</id>
<url>https://repository.cloudera.com/artifactory/cloudera-repos/</url>
</repository>
</repositories>
<dependencies>
<dependency>
<groupId>org.apache.hadoop</groupId>
<artifactId>hadoop-common</artifactId>
<version>2.2.0</version>
</dependency>
<dependency>
<groupId>org.apache.hadoop</groupId>
<artifactId>hadoop-core</artifactId>
<version>1.2.1</version>
</dependency>
<dependency>
<groupId>jdk.tools</groupId>
<artifactId>jdk.tools</artifactId>
<version>1.7</version>
<scope>system</scope>
<systemPath>${java.home}/../lib/tools.jar</systemPath>
</dependency>
</dependencies>
创建上传Hadoop的Jar包,输出目录是lib:
<fileSets>
<fileSet>
<directory>${project.build.directory}</directory>
<outputDirectory>/</outputDirectory>
<includes>
<include>*.jar</include>
</includes>
</fileSet>
</fileSets>
<dependencySets>
<dependencySet>
<useProjectArtifact>false</useProjectArtifact>
<outputDirectory>/lib</outputDirectory>
</dependencySet>
</dependencySets>
hadoop的Linux下简单安装步骤
首先安装Hadoop cluster版本:
$ curl -O http://archive.cloudera.com/cdh/3/hadoop-0.20.2-cdh3u6.tar.gz
$ cd /usr/local
$ tar xzvf /path/to/hadoop-0.20.2-cdh3u6.tar.gz
$ ln -s hadoop-0.20.2-cdh3u6 hadoop配置工作:
$ cd hadoop
$ mv conf conf.original
$ cp -Rp example-confs/conf.pseudo conf
将/usr/local/hadoop/bin加入PATH环境
$ export PATH=/usr/local/hadoop/bin:$PATH格式化HDFS
建立临时文件目录 /var/lib/hadoop-0.20/
chmod 0777 -R /var/lib/hadoop-0.20/
chmod 0777 -R /usr/local/hadoop/
以普通用户登录,非ROOT用户,然后运行:
hadoop namenode -format出现:O common.Storage: Storage directory /var/lib/hadoop-0.20/cache/hadoop/dfs/name has been successfully formatted.
表示OK。分别运行:
$ hadoop namenode
$ hadoop datanode
$ hadoop jobtracker
$ hadoop tasktracker
下页
Hadoop专题
Storm大数据实时处理
Hive架构
NoSQL
NOSQL之旅---HBase
Big Data 辩论: HBase会统治NoSQL世界吗?
东南亚最大消费App经验:大数据分析为什么大多数会失败?
大数据专题