Spring批处理分区分片
在Spring batch中,Partitioning意味着对数据进行分片,然后每片实现专门处理,假设单线程处理100个数据需要10分钟,但是 我们将100个数据分片成十块,每块单独处理:
Thread 1 - Process from 1 to 10
Thread 2 - Process from 11 to 20
Thread 3 - Process from 21 to 30
      ......
Thread 9 - Process from 81 to 90
Thread 10 - Process from 91 to 100
这样整个过程可能只需要1 分钟。
分区原理是一个master主处理器对应多个从slave处理器:

从处理器的节点可以是远程服务器的服务,也可以是本地执行的线程。主处理器发送给从处理器的消息是不需要持久或实现JMS那种严格的保证消息传递的,Spring Batch元数据JobRepository会确保每个slave执行一次,每次Job执行只执行一次。
本地分区
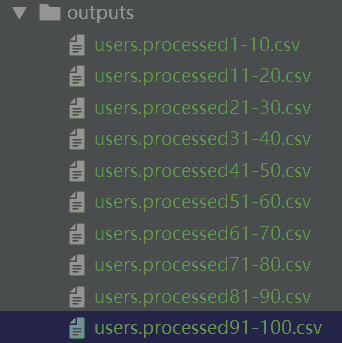
我们的案例是从数据库表user导出数据库到User对象,然后到保存10个csv文件中。
看看csv文件:
从数据表写入数据后大概为:
| 1 | dd | password | 30 | |
| 2 | dd | password | 24 | |
| 3 | dd | password | 22 | |
| 4 | dd | password | 28 | |
| 5 | dd | password | 34 | |
| 6 | dd | password | 20 |
姓名:密码:年龄
用户User模型是:
@Data
@Entity
public class User {
   @Id
@GeneratedValue(strategy = GenerationType.IDENTITY)
  int id;
  String username;
  String password;
  int age;
}
这里使用了lomok,节省setter/getter代码编写,使用了JPA注释主要是为了能自动生成数据表user:
CREATE TABLE  `user` (
  `id` int(11) NOT NULL ,
  `username` varchar(45) NOT NULL default '',
  `password` varchar(45) NOT NULL default '',
  `age` int(11) ,
  PRIMARY KEY  (`id`)
) ENGINE=InnoDB AUTO_INCREMENT=1 DEFAULT CHARSET=utf8;

insert into `user` (`id`, `age`, `password`, `username`) values('1','30','password','1dd');
insert into `user` (`id`, `age`, `password`, `username`) values('2','24','password','2dd');
insert into `user` (`id`, `age`, `password`, `username`) values('3','22','password','3dd');
insert into `user` (`id`, `age`, `password`, `username`) values('4','28','password','4dd');
insert into `user` (`id`, `age`, `password`, `username`) values('5','34','password','5dd');
insert into `user` (`id`, `age`, `password`, `username`) values('6','20','password','6dd');
将这个sql存入schema.sql和application.properties放一起,这样启动时再配置一下,就可以自动生成数据表,application.properties配置如下:
spring.batch.initialize-schema=always

spring.datasource.url=jdbc:mysql://localhost:3306/mytest
spring.datasource.username=root
spring.datasource.password=root
spring.datasource.driver-class-name=com.mysql.jdbc.Driver

spring.jpa.generate-ddl=true
最后一行是自动生成User表,第一行是生成Spring batch 自身的表。
基础条件准备好了,看看分区核心类:
@Configuration
@EnableBatchProcessing
public class PartitionerJob {

  @Autowired
  private JobBuilderFactory jobBuilderFactory;
  @Autowired
  private StepBuilderFactory stepBuilderFactory;
  @Autowired
  private DataSource dataSource;

  @Bean
  public Job PartitionJob() {
    return jobBuilderFactory.get("partitionJob").incrementer(new RunIdIncrementer())
        .start(masterStep()).next(step2()).build();
  }

  @Bean
  public Step step2() {
    return stepBuilderFactory.get("step2").tasklet(dummyTask()).build();
  }

  @Bean
  public DummyTasklet dummyTask() {
    return new DummyTasklet();
  }

  @Bean
  public Step masterStep() {
    return stepBuilderFactory.get("masterStep").partitioner(slave().getName(), rangePartitioner())
        .partitionHandler(masterSlaveHandler()).build();
  }

  @Bean
  public PartitionHandler masterSlaveHandler() {
    TaskExecutorPartitionHandler handler = new TaskExecutorPartitionHandler();
    handler.setGridSize(10);
    handler.setTaskExecutor(taskExecutor());
    handler.setStep(slave());
    try {
      handler.afterPropertiesSet();
    } catch (Exception e) {
      e.printStackTrace();
    }
    return handler;
  }

  @Bean(name = "slave")
  public Step slave() {
    log.info("...........called slave .........");

    return stepBuilderFactory.get("slave").<User, User>chunk(100)
        .reader(slaveReader(null, null, null))
        .processor(slaveProcessor(null)).writer(slaveWriter(null, null)).build();
  }

  @Bean
  public RangePartitioner rangePartitioner() {
    return new RangePartitioner();
  }

  @Bean
  public SimpleAsyncTaskExecutor taskExecutor() {
    return new SimpleAsyncTaskExecutor();
  }

  @Bean
  @StepScope
  public UserProcessor slaveProcessor(@Value("#{stepExecutionContext[name]}") String name) {
    log.info("********called slave processor **********");
    UserProcessor userProcessor = new UserProcessor();
    userProcessor.setThreadName(name);
    return userProcessor;
  }

  @Bean
  @StepScope
  public JdbcPagingItemReader<User> slaveReader(
      @Value("#{stepExecutionContext[fromId]}") final String fromId,
      @Value("#{stepExecutionContext[toId]}") final String toId,
      @Value("#{stepExecutionContext[name]}") final String name) {
    log.info("slaveReader start " + fromId + " " + toId);
    JdbcPagingItemReader<User> reader = new JdbcPagingItemReader<>();
    reader.setDataSource(dataSource);
    reader.setQueryProvider(queryProvider());
    Map<String, Object> parameterValues = new HashMap<>();
    parameterValues.put("fromId", fromId);
    parameterValues.put("toId", toId);
    log.info("Parameter Value " + name + " " + parameterValues);
    reader.setParameterValues(parameterValues);
    reader.setPageSize(1000);
    reader.setRowMapper(new BeanPropertyRowMapper<User>() {{
      setMappedClass(User.class);
    }});
    log.info("slaveReader end " + fromId + " " + toId);
    return reader;
  }

  @Bean
  public PagingQueryProvider queryProvider() {
    log.info("queryProvider start ");
    SqlPagingQueryProviderFactoryBean provider = new SqlPagingQueryProviderFactoryBean();
    provider.setDataSource(dataSource);
    provider.setSelectClause("select id, username, password, age");
    provider.setFromClause("from user");
    provider.setWhereClause("where id >= :fromId and id <= :toId");
    provider.setSortKey("id");
    log.info("queryProvider end ");
    try {
      return provider.getObject();
    } catch (Exception e) {
      log.info("queryProvider exception ");
      e.printStackTrace();
    }

    return null;
  }

  @Bean
  @StepScope
  public FlatFileItemWriter<User> slaveWriter(
      @Value("#{stepExecutionContext[fromId]}") final String fromId,
      @Value("#{stepExecutionContext[toId]}") final String toId) {
    FlatFileItemWriter<User> reader = new FlatFileItemWriter<>();
    reader.setResource(new FileSystemResource(
        "csv/outputs/users.processed" + fromId + "-" + toId + ".csv"));
    //reader.setAppendAllowed(false);
    reader.setLineAggregator(new DelimitedLineAggregator<User>() {{
      setDelimiter(",");
      setFieldExtractor(new BeanWrapperFieldExtractor<User>() {{
        setNames(new String[]{"id", "username", "password", "age"});
      }});
    }});
    return reader;
  }
}
在PartitionerJob:
- 在TaskExecutorPartitionHandler设置实际线程数的网格大小。
- 对于slaveReader, ,#{stepExecutionContext[fromId]},#{stepExecutionContext[toId]和#{stepExecutionContext[name]值将被注入ExecutionContext中rangePartitioner。
- 对于writer,每个线程将以不同的csv文件输出记录,文件名格式为:users.processed [fromId]} - [toId] .csv。
- DummyTasklet是一个汇聚任务,从处理结束后的汇聚,这里什么都不做
主节点步骤如下:
public Step masterStep() {
  return stepBuilderFactory.get("masterStep").partitioner(slave().getName(), rangePartitioner())
      .partitionHandler(masterSlaveHandler()).build();
}

@Bean
public RangePartitioner rangePartitioner() {
  return new RangePartitioner();
}
这里有一个rangePartitioner对象,是我们的核心分区类,对每个分区后的从节点处理器具体业务:
@Slf4j
public class RangePartitioner implements Partitioner {

  @Override
  public Map<String, ExecutionContext> partition(int gridSize) {
    log.info("partition called gridsize= " + gridSize);

    Map<String, ExecutionContext> result
        = new HashMap<String, ExecutionContext>();

    int range = 10;
    int fromId = 1;
    int toId = range;

    for (int i = 1; i <= gridSize; i++) {
      ExecutionContext value = new ExecutionContext();

      System.out.println("\nStarting : Thread" + i);
      System.out.println("fromId : " + fromId);
      System.out.println("toId : " + toId);

      value.putInt("fromId", fromId);
      value.putInt("toId", toId);

      // give each thread a name, thread 1,2,3
      value.putString("name", "Thread" + i);

      result.put("partition" + i, value);

      fromId = toId + 1;
      toId += range;

    }
    return result;
  }
}
核心类是在每个线程输出:
Starting : Thread1
fromId : 1
toId : 10
Starting : Thread2
fromId : 11
toId : 20
Starting : Thread3
fromId : 21
toId : 30
Starting : Thread4
fromId : 31
toId : 40
Starting : Thread5
fromId : 41
toId : 50
Starting : Thread6
fromId : 51
toId : 60
Starting : Thread7
fromId : 61
toId : 70
Starting : Thread8
fromId : 71
toId : 80
Starting : Thread9
fromId : 81
toId : 90
Starting : Thread10
fromId : 91
toId : 100
现在再回到看看主步骤后面一个动作,设置了masterSlaveHandler类:
@Bean
public PartitionHandler masterSlaveHandler() {
  TaskExecutorPartitionHandler handler = new TaskExecutorPartitionHandler();
  handler.setGridSize(10);
  handler.setTaskExecutor(taskExecutor());
  handler.setStep(slave());
  try {
    handler.afterPropertiesSet();
  } catch (Exception e) {
    e.printStackTrace();
  }
  return handler;
}
这里设置了分片大小为10个,同时设置了异步任务执行器,也将从节点的步骤设置进去。
以上源码可见:github
远程分区
远程分区=本地分区+远程分块,远程分块可见之前教程,实际是远程分块加上JMS消息系统,实现分布式系统协调计算。具体代码可见spring batch remote partition
我们看一下主要步骤代码:
@Bean
public Job remotePartitioningJob() {
   return this.jobBuilderFactory.get("remotePartitioningJob")
         .start(masterStep())
         .build();
}

/*
 * Configure the master step
 */
@Bean
public Step masterStep() {
   return this.masterStepBuilderFactory.get("masterStep")
         .partitioner("workerStep", new BasicPartitioner())
         .gridSize(GRID_SIZE)
         .outputChannel(requests())
         .build();
}
这里的BasicPartitioner类似rangePartitioner,后面就与本地分区不一样了,设置了grid大小以后,就输出到JMS outputChanner,与从节点进行通信,看看从节点代码:
/*
 * Configure the worker step
 */
@Bean
public Step workerStep() {
   return this.workerStepBuilderFactory.get("workerStep")
         .inputChannel(requests())
         .tasklet(tasklet(null))
         .build();
}

@Bean
@StepScope
public Tasklet tasklet(@Value("#{stepExecutionContext['partition']}") String partition) {
   return (contribution, chunkContext) -> {
      System.out.println("processing " + partition);
      return RepeatStatus.FINISHED;
   };
}
从节点使用inputChannel从JMS监听到消息以后,运行tasklet。
这里主节点发生消息到从节点以后,从节点并没有返回响应,如果希望获得从节点结果汇聚到主节点,类似Map/reduce的reduce作用,那么主节点代码如下:
@Bean
public Step masterStep() {
   return this.masterStepBuilderFactory.get("masterStep")
         .partitioner("workerStep", new BasicPartitioner())
         .gridSize(GRID_SIZE)
         .outputChannel(requests())
         .inputChannel(replies())
         .build();
}
我们发现outputChannel以后有从replies队列用inputChannel获得消息。看看从节点是怎么回复结果的:
@Bean
public Step workerStep() {
   return this.workerStepBuilderFactory.get("workerStep")
         .inputChannel(requests())
         .outputChannel(replies())
         .tasklet(tasklet(null))
         .build();
}
这里是inputChannel以后再输出outputChannel到replies队列。